Bindings
When you create a binding to a property, you force that property to assume the value of the binding source, or to assume a value that is calculated based on that source. The target property then updates in real time as the source value changes.
In DGLux5, properties that are currently determined by bindings are outlined in blue.
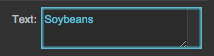
A property that is currently determined by a binding
DGLux5 has two types of bindings:
- Property to property: One property determines another property.
- Data to property: A data value determines a property.
Properties are the many customizable aspects of a DGLux5 element, including appearance and behavior. The following types of items have properties:
Video Tutorial: Binding Date Range to Chart
This video shows binding one property to another property.
Video Tutorial: Data Binding and Data Actions
This video shows binding a data value to a property. Furthermore, it shows using the binding dialog to create a data mapping.
More video tutorials are here.
Binding from one Property to Another
To bind one property to another:
- Hover over the source property, until a blue dot appears.
- Drag the blue dot to the target property, and drop it.
Using the Small Binding Pop-Up
Sometimes, both properties can't be visible in DGLux5 panels at the same time. When this happens:
- Hover over either the source property or the target property until a blue a dot appears.
Double-click the blue dot, or click the blue dot and select Bind.
A small pop-up dialog opens, representing the property. A blue wire connects the property and its parent in the Document window.
- Navigate to the other property.
- Click the blue dot of the source property, and drag it to the target property.
- Close the pop-up.
The example below ensures a rectangular component is always a square, by binding its length to its height.

Binding from the binding pop-up to the Property Inspector
Tips
- The small binding pop-up can hold several properties at once.
- To remove a property from the binding pop-up, hover over it and click
 Remove.
 - If you hover over any property and a blue dot appears, it indicates that the property can be used in bindings.
- Some component types have a default property. For example, the default property of a text box is its Text property. To bind to an component's default property, drag and drop a metric or property onto the component in the Document window.
Events and Triggers
Some properties are events. Events fire automatically when something happens, such as a user interaction or the completion of a data process.
Other properties are triggers. Triggers cause things to occur, such as a callout being displayed or a data process beginning.
You can bind an event to a trigger. This invokes the trigger whenever the event fires. For example, you can cause a user click interaction to display a callout.
You can also bind some other property, such as a number, to a trigger. This invokes the trigger whenever the source property value changes. For example, you can re-upload a string whenever the value of the string is edited.

Binding user interaction events to triggers
Binding Data to a Property
You can cause data values to determine properties.
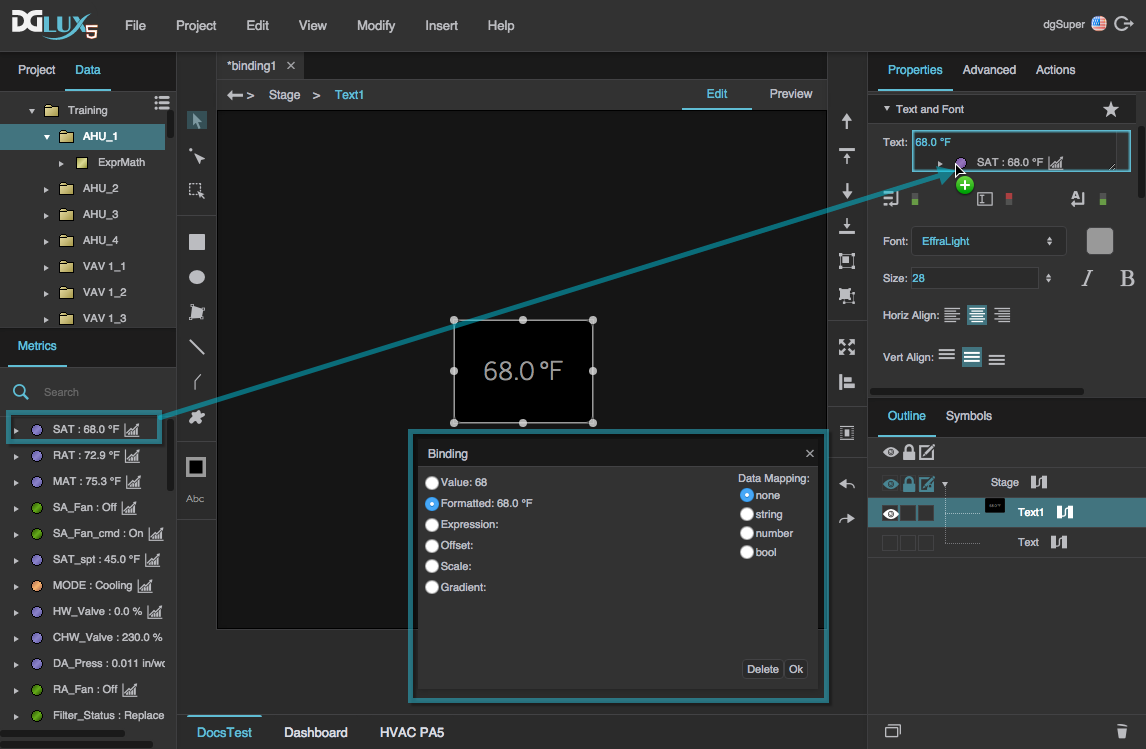
For example, to make a text box that shows the current value of a temperature metric:
- In the Data panel, select the relevant data source.
- In the Metrics panel, find the temperature metric.
Drag the metric from the Metrics panel to the Property Inspector, and drop it on the Text property.
The binding dialog opens.
In the binding dialog, select the Formatted option to display a formatted number.
Binding Dataflow Output to a Property
You can also bind a value from dataflow to a property.
For example, to create a text component that displays a sentence based on the user's geographical location:
- Open dataflow for the text component, expand Browser API, and drag a Geo-Location block onto the dataflow window.
Set the block's enabled property to TRUE.
If your browser asks you to allow DGLux5 to access your location, accept.
- Expand String Operations, and drag a Concatenate block onto the dataflow window.
- On the Concatenate block, click the
 plus sign to add three additional input properties.
 - Round the latitude number value to thousandths:
- Expand Number Formatting, and add a Round block to the dataflow window.
- Link the latitude property to the Round block's input property.
- Set precision to 3, to display three digits after the decimal.
- Repeat step 3 to round the longitude number.
- Configure the Concatenate block as follows:
- input 0: Type,
Your location is: - input 1: Link the rounded latitude number.
- input 2: Type,
, - input 3: Link the rounded longitude number.
- input 4: Type,
.
Finally, bind the output property of the Concatenate block to the Text property of the text component. You can do this by dragging the arrowhead from the dataflow block, or by dragging the blue dot from the dataflow properties panel.

Binding using the dataflow block's orange arrowhead
Binding using the Dataflow properties panel
Binding Dialog
The binding dialog lets you create a calculated or formatted value for the target, based on the source value. It also lets you create data mappings.
Opening and Closing the Binding Dialog
The binding dialog opens automatically when you create a binding from a data metric. Otherwise, to open the binding dialog when creating a binding:
- Begin dragging the binding source.
- While dragging, press and hold the Ctrl key.
- Drop the binding source on the binding target.
To open the binding dialog and edit an existing binding:
- Hover over the binding target until a blue dot appears.
Click the blue dot, and select Binding Dialog.
This works only if the existing binding either has a data metric as its source or was created using the binding dialog.
To close the binding dialog:
- Click OK (saves current changes to the binding)
- Click the X in the top right corner (discards current changes)
- Click Delete (discards the binding entirely)
Data Bindings in the Binding Dialog
The binding dialog can create these types of data bindings:
Data Mappings in the Binding Dialog
The binding dialog can also perform a data mapping. A data mapping compares the binding's source value to one or more Case values in order, until the statement it is evaluating is true:
- For numbers, a data mapping evaluates whether the source value is less than or equal to the Case value.
- For other data types, the data mapping checks whether the source value is equal to the Case value.
When the first true statement is encountered, that Mapping value is assigned to the binding's target. If none of the statements is true, the default value is assigned to the binding's target.
More complex case mappings can be created in the dataflow using the Case block.
A data mapping has these options:
- Case n — A test value to compare with the input.
- Mapping n — A value to assign to the target if the expression with Case n evaluates to true.
- default — A value to assign to the target if none of the expressions are true.
Multiple cases can be used. To add cases, click  Add. To delete a case, click Remove.
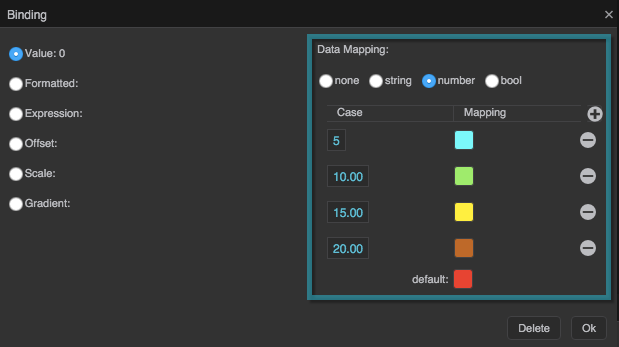
Binding Dialog Example: Map Data Ranges to Colors
This example shows you how to map data ranges to colors, in order to create a shape whose color reflects a data value.
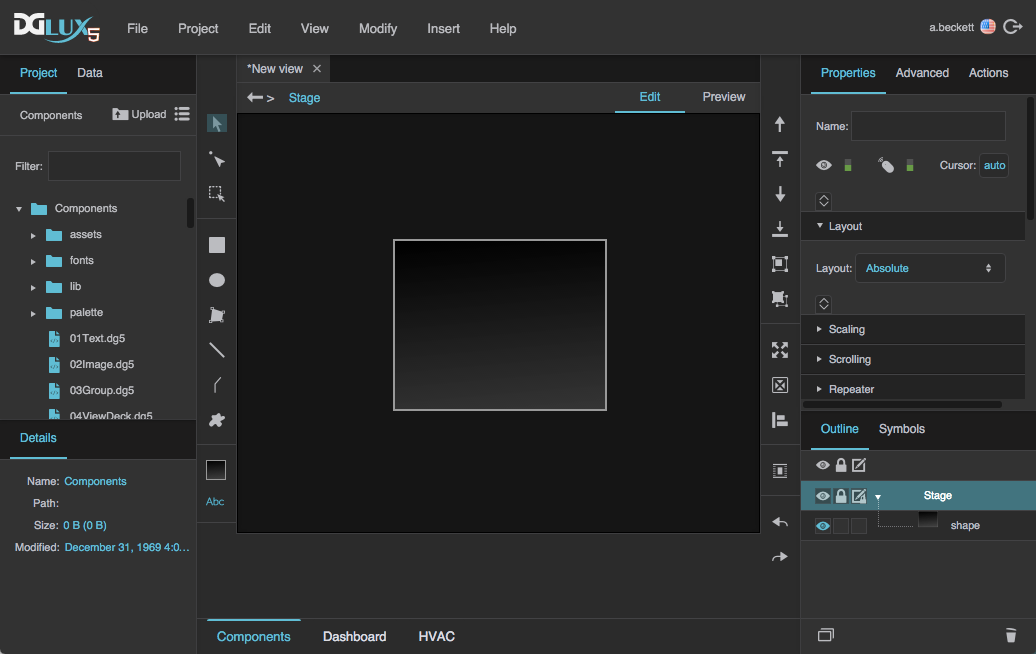
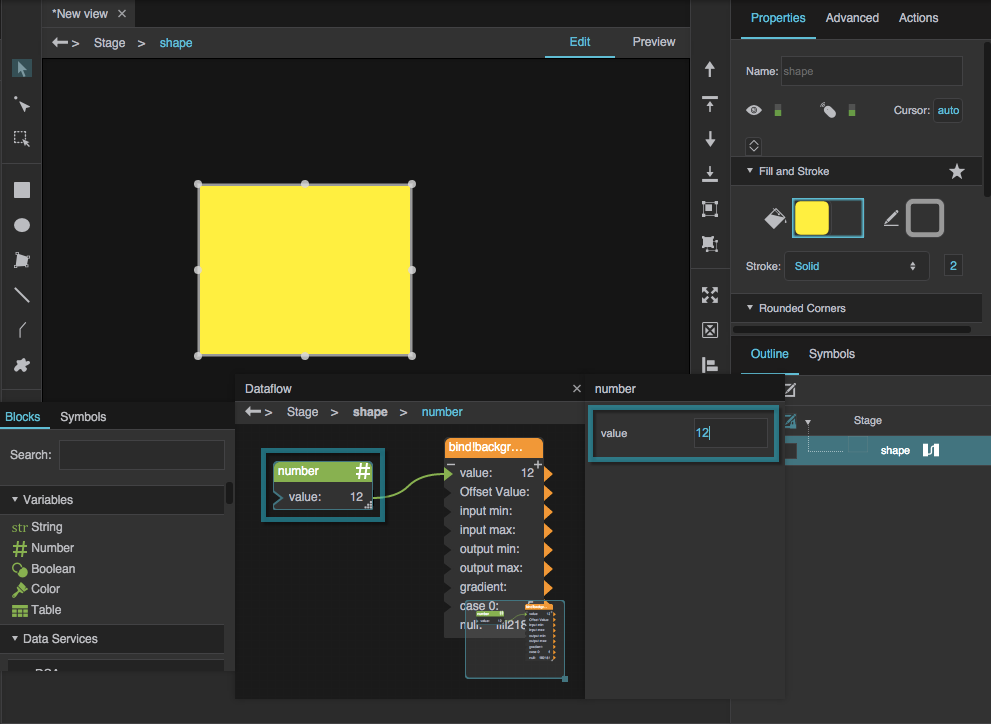
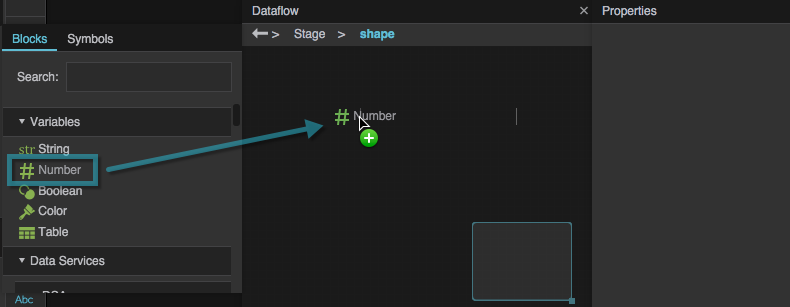
Create a shape on the stage.
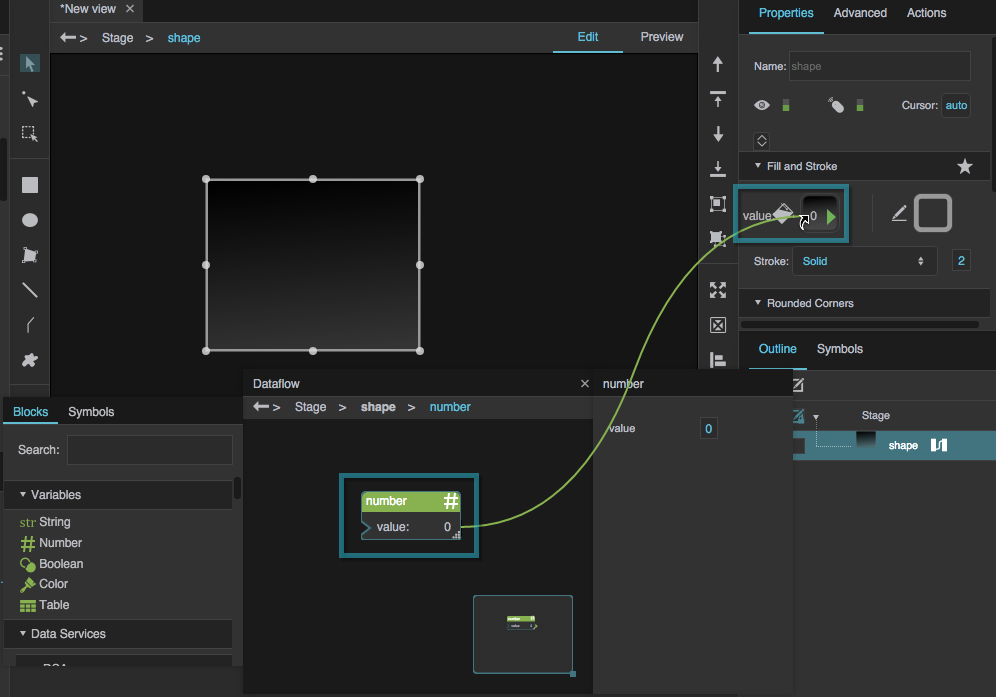
Bind the value property of the Number block to the Fill property of the shape. Hold Ctrl while dropping to open the binding dialog.
- In the binding dialog:
- For Data Mapping, select number.
- Add three cases, for a total of four, by clicking Add three times.
- For the cases, enter
5,10,15, and20. These must be in ascending order. - For the colors, choose four color values, and also a default color value.
Click OK.
Test your data mapping by changing the value in the Number block. Values less than or equal to 5 use the first color, and so on.
Data mapping can be used together with a repeater or custom item renderer to create items whose data values determine their properties. For more guidance, see Charts FAQ.
Review a Binding
To review the source or targets of a property's binding:
Hover over the property until a blue dot appears, click the blue dot, and select Binding Path to review the source, or
 Binding Targets to review the targets.
A pop-up appears. This pop-up lists the path or targets. It uses page model syntax.
Delete a Binding
To delete a binding:
- Hover over the property until a blue dot appears, click the blue dot, and select Unbind.
To delete a binding, and also reset the property value to its default:
- Hover over the property until a blue dot appears, click the blue dot, and select Reset.